Often we need to merge multiple pdfs into one document and it’s easy to do it on a Mac running OS X. Here’s how to make an application that you can run to merge the selected files. I’m writing this using a Mac running 10.9 Mavericks. You can do this on any version that has automator but it might differ slightly because Automator has changed over the years. This post comes in a series of posts I’ve done on manipulating pdfs on a Mac:
- Re-order pages of a pdf
- Delete individual pages of a pdf
- Rotate individual pages of a pdf
- Insert pages into a pdf
- Create a new pdf from one or more pages of a pdf
How to Create a Mac Application to Merge Pdf’s in Automator
Step 1: Launch Automator. You can find it in your applications folder.
| Automator.app |
Step 2: Double-click on “Application.”
The drop down menu that greets you when you launch Automator wants to know what type of document you wish to create. You’ll want to pick Application. If it doesn’t give you this menu when you launch Automator simply use the keyboard shortcut Command-N to create a new Automation document.
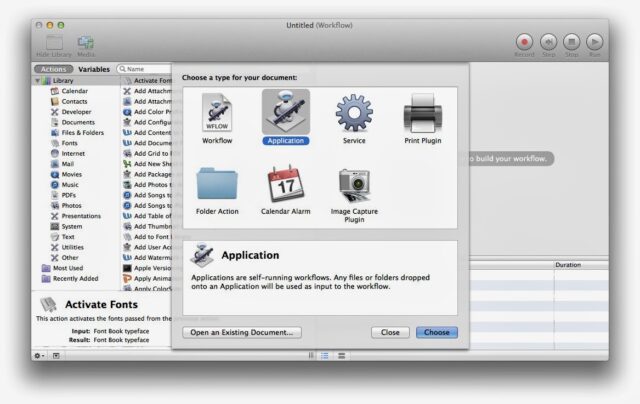 |
| Automator Document Types |
Step 3: Type “Get Selected Finder Items” in the Search box at the top of the window while “Library” is selected in the left column (it is by default).
The Action called “Get Selected Finder Items” will be listed in the middle column.
 |
| Search for “Get Selected Finder Items” |
Step 4: Drag and drop the “Get Selected Finder Items” to the right grey window.
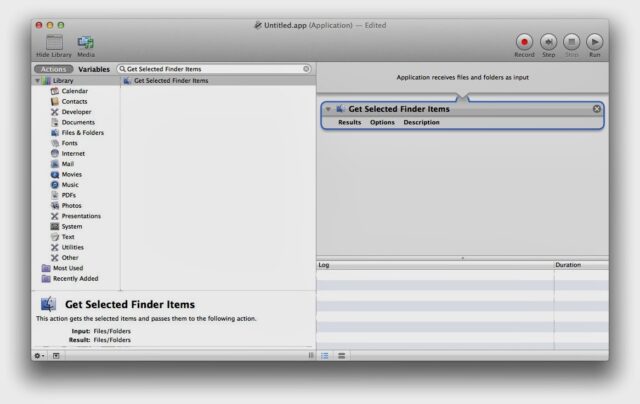 |
| Drag and drop “Get Selected Finder Items” into the right window |
You’ll see the action show up in the right window.
Step 5: Type “Combine PDF Pages” in the search box.
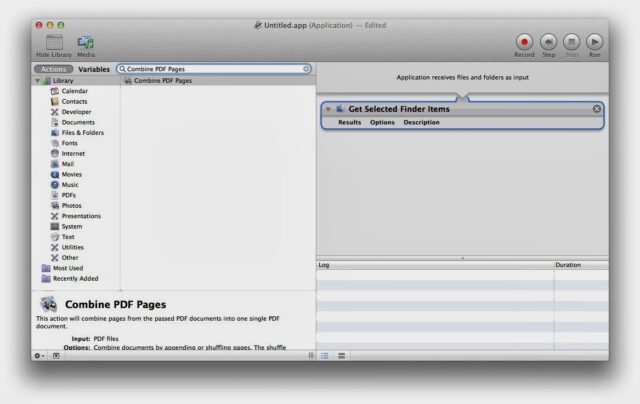 |
| Search for “Combine PDF Pages” |
Step 6: Drag and drop “Combine PDF Pages” below the “Get Selected Finder Items” in the right window.
It will look like the image below when you are done. You can drag the items into different order if you want.
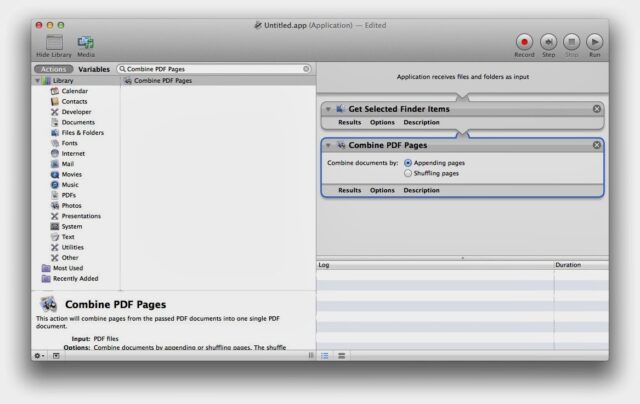 |
| Drag and drop “Combine PDF Pages” below the “Get Selected Finder Items” in the workflow window on the right |
Step 7: Save the Application.
Either select Save from the File menu or press the keyboard shortcut Command-S to bring up the save window. Note: the File format should say Application.
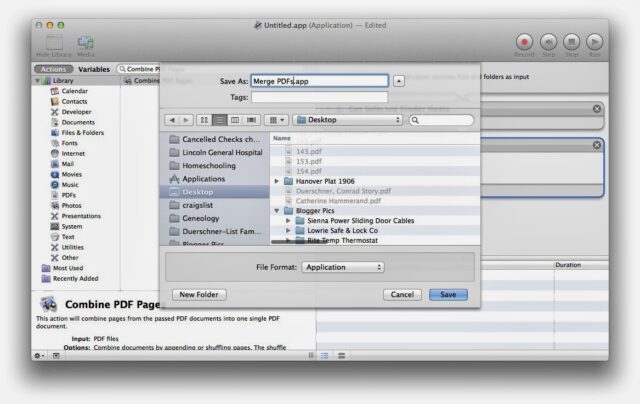 |
| Save your workflow as an Application |
Step 8: Add the Application to your dock for easy access.
Drag and drop the application file to your dock so that you can run it at any time.
 |
| Add the Merge PDFs Application to your dock |
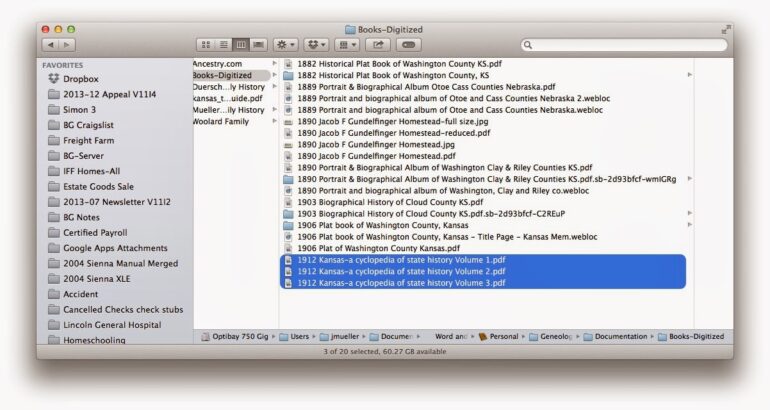
Step 9: Merge the pdf’s by selecting the pdf files in the finder and then clicking on the Merge PDFs Application icon in the dock.
You can select them by clicking and dragging or by clicking on the first file and then holding down the shift key and then clicking on the last file and selecting the entire range of files.
 |
| Select the pdf files you wish to merge in Finder |
Once you launch the Application you will see a gear up on the menu bar at the top of the page indicating that the workflow is running. You won’t see it for long if you are only merging a few pages. The merged pdf file will then open in Preview or whatever your default pdf viewer application.
Note: Don’t forget to save your merged pdf. You will then need to save it to the location of your choice because it opens in a temporary location (with a name of random characters) and you’ll lose the file if you don’t save it somewhere.
 |
| Automator Gear in Menu Bar |
My other Apple Automator blog posts:
- How to Use Automator and Applescript to Automate Connecting to a Specific SMB Drive
- How to Create a Custom Print Workflow to Save Printed PDFs to a Folder Automatically with Automator
- How to Create a Folder Action to Resize Your Photos Using Mac OS X Automator
- How to Open Websites on Your Mac From Your iPhone Using Dropbox, a Sendtodropbox.com Account, and Folder Actions
- How to Create a Mac Application to Merge Pdf’s in Automator (this post)
- Excel Toolbars Disappear-How to Automate Fixing Them With Automator in Excel 2008 For Mac
Amazon Associate Disclosure: As an Amazon Associate I earn from qualifying purchases. This means if you click on an affiliate link and purchase the item, I will receive an affiliate commission. The price of the item is the same whether it is an affiliate link or not. Regardless, I only recommend products or services I believe will add value to Share Your Repair readers. By using the affiliate links, you are helping support Share Your Repair, and I genuinely appreciate your support.