
For the longest Apple has had AppleScript, which allows you to automate things with your OS and application developers that took advantage of the ways they could open up their programs to AppleScript. I toyed around with AppleScript way back but it uses what is called “natural language programming” and I don’t like that at all. For me, it would have been much easier if it was just if, then, else statements instead of guessing what “natural language” phrase they chose to use. Anyway, with the advent of Mac OS 10.4 Apple released Automator, which allows you to built powerful automations via a graphical drag-and-drop interface. I’ve created a handful of different workflows that have saved me tons of time. Here I’ll detail how to make a Print Workflow that shows up in the Print > PDF menu so you can automatically print a pdf that is automatically saved with a filename that includes the date and the first part of the website’s title in a folder you have predetermined. I use it to save receipts of web-based purchases.
How to Create a Custom Print Workflow to Save Printed PDFs to a Folder Automatically with Automator
Software:
- Mac OS 10.8
- Automator 2.3
Step 1: Run Automator.
It’s in the Applications folder of your Macintosh HD or you can just click on the Spotlight magnifying glass icon in the top right of the menu bar and begin to type Automator.
Step 2: Select “Print Plugin.”

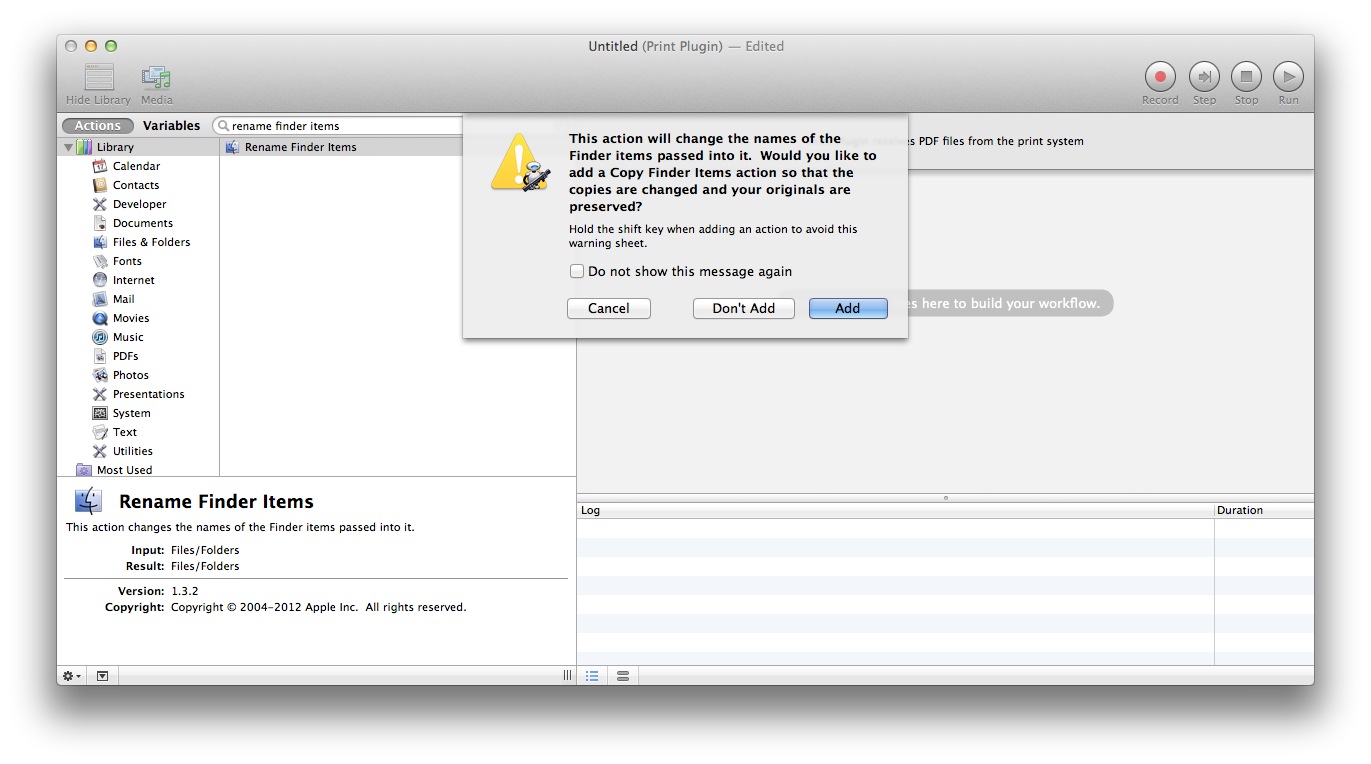
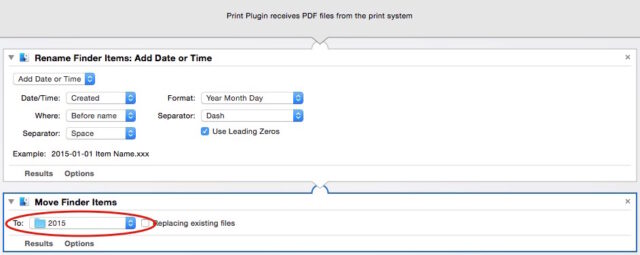
Step 3: Add “Rename Finder Items” to the Automation.


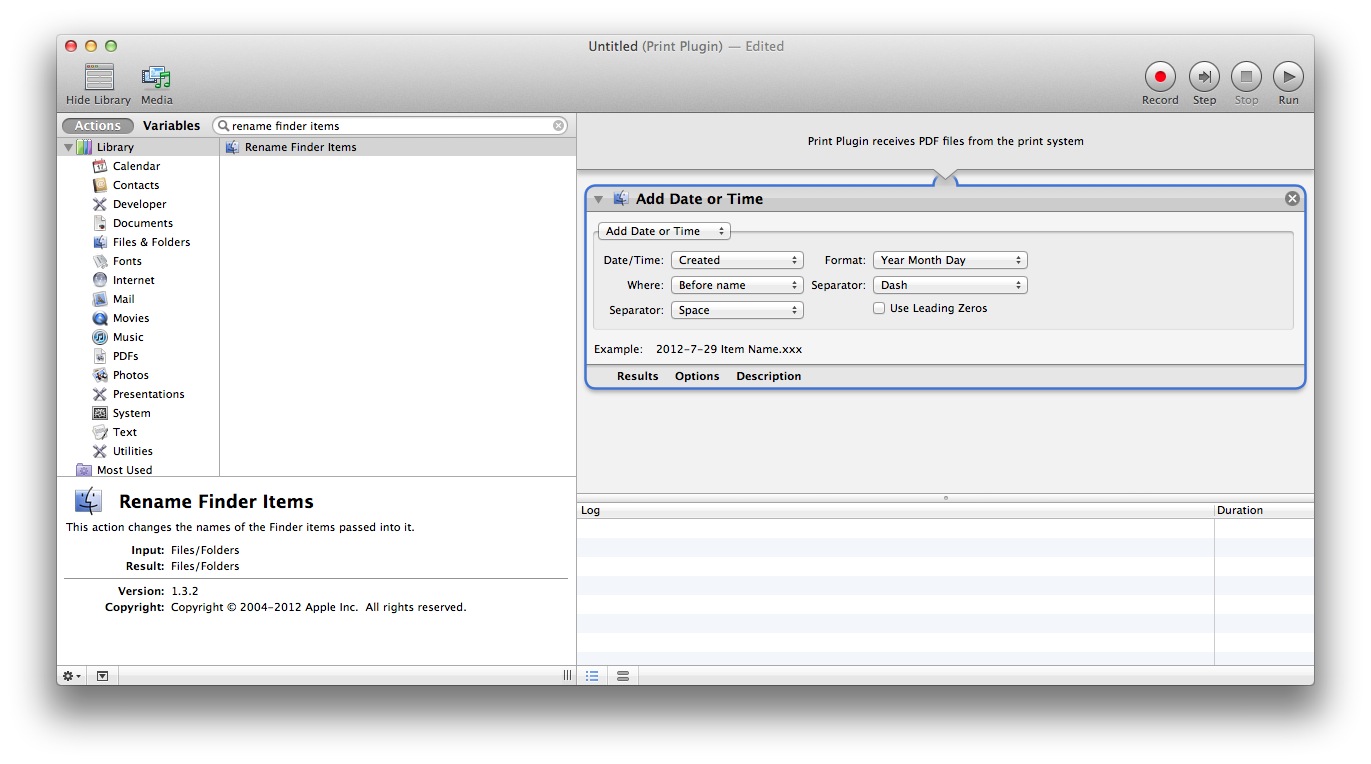
Step 4: Configure the “Rename Finder Items” Action.
Step 5: Add “Move Finder Items” Action to the workflow.

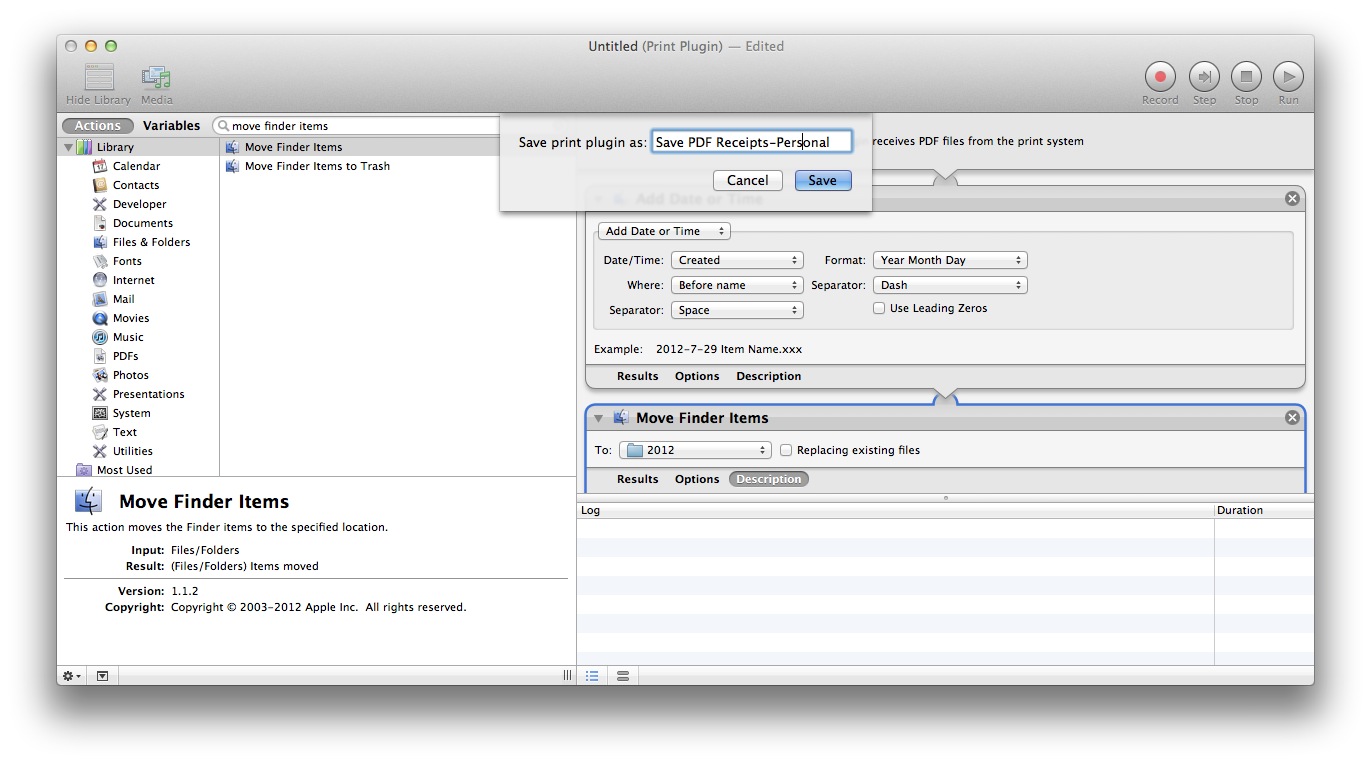
Step 6: Configure the “Move Finder Items” Action.
Step 6: Save/Name Your Print Plugin Workflow.

Update–Modifying your Print Workflow for the New Year:
When a new year comes around like it has today, you must change the folder your workflow points to and change the name of the menu item. Here’s how to do that…
Step 1: Open the Library folder in the Finder.
Switch to the Finder and click on the “Go” menu at the very top of the screen and hold down the “option” key to show the hidden “Library” item.
Step 2: Find the “PDF Services” Folder and find the workflow you previously created.
| Macintosh HD > Users > username > Library > PDF Services > workflow-file.workflow |
Step 3: Rename the file name to have the current year.
Step 4: Double-click on the workflow file and change the folder it saves the pdf to be the current year.
El Capitan Update
After I updated to El Capitan my print workflow stopped working. You would see the gear turning in the menu bar but no file would show up in the designated folder. I did some searching and found this thread which did not work for me exactly like they suggested but by adding a “dummy” quartz filter at the beginning of the workflow with the filter set to “None” as seen below:
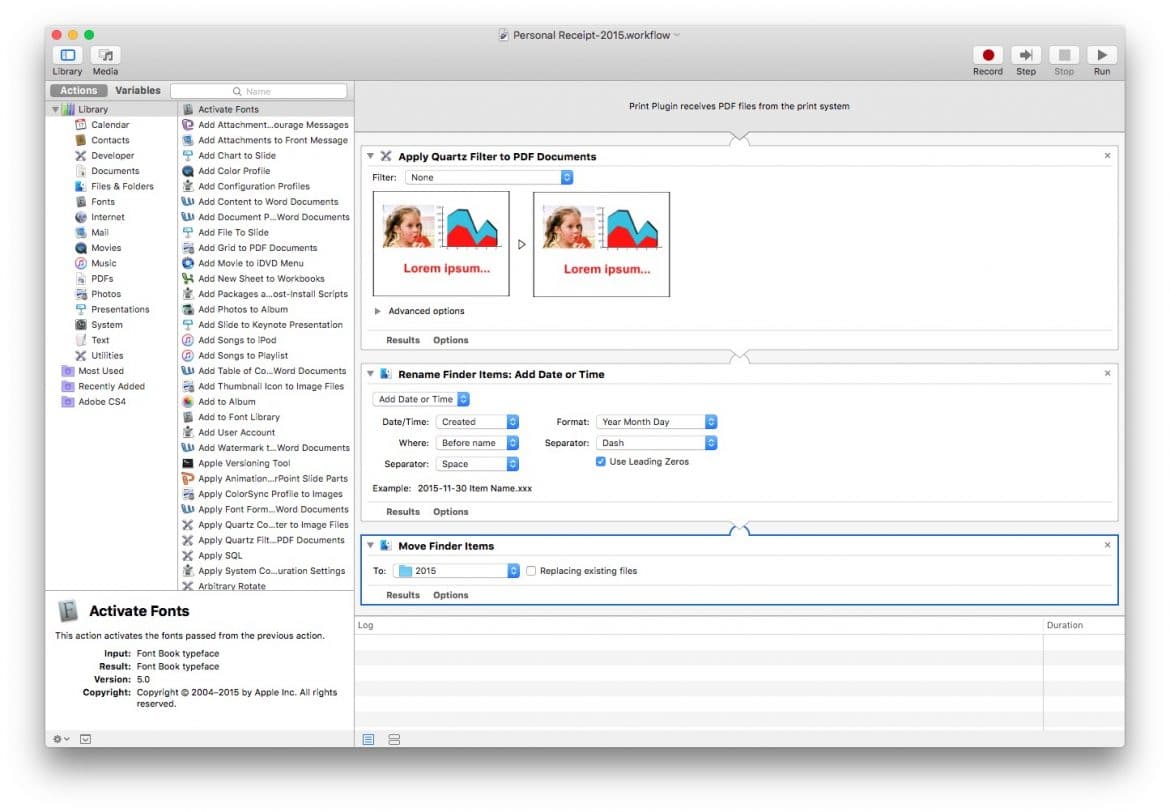
After adding the quartz filter the workflow worked again.
My other Apple Automator blog posts:
- How to Use Automator and Applescript to Automate Connecting to a Specific SMB Drive
- How to Create a Custom Print Workflow to Save Printed PDFs to a Folder Automatically with Automator (this post)
- How to Create a Folder Action to Resize Your Photos Using Mac OS X Automator
- How to Open Websites on Your Mac From Your iPhone Using Dropbox, a Sendtodropbox.com Account, and Folder Actions
- How to Create a Mac Application to Merge Pdf’s in Automator
- Excel Toolbars Disappear-How to Automate Fixing Them With Automator in Excel 2008 For Mac
Amazon Associate Disclosure: As an Amazon Associate I earn from qualifying purchases. This means if you click on an affiliate link and purchase the item, I will receive an affiliate commission. The price of the item is the same whether it is an affiliate link or not. Regardless, I only recommend products or services I believe will add value to Share Your Repair readers. By using the affiliate links, you are helping support Share Your Repair, and I genuinely appreciate your support.